
Disclosure: I only recommend products I would use myself and all opinions expressed here are my own. This post may contain affiliate links that at no additional cost to you, I may earn a small commission
As a design enthusiast and blogger who’s spent years experimenting with budget home decor DIY projects in my own home and helping friends transform their spaces, I’ve discovered something most people don’t realize: the most stunning interiors often come from creativity and resourcefulness, not deep pockets.
Over the past several years, I’ve tested DIY projects, countless budget decor ideas, and learned from both spectacular successes and epic failures. What I’ve discovered is that there’s a specific methodology to making cheap home decor DIY look intentional and sophisticated rather than, well, cheap.
Today, I’m sharing everything I’ve learned through trial and error, research, and collaboration with professional designers who’ve mentored me along the way.
Whether you’re a fellow design enthusiast, an aspiring architect, or someone who simply believes your home should reflect your personality without breaking the bank, this guide will show you the exact strategies that have worked for me and my readers.
Why Most Budget Decor DIY Projects Fail (And How to Avoid These Mistakes)
Before diving into specific techniques, let me share what I wish someone had told me when I started: understanding why certain DIY projects succeed while others look amateurish.
After analyzing hundreds of before-and-after photos from my blog readers, I’ve identified the key difference: intentionality.
The 70-20-10 Budget Allocation Strategy I Swear By
Through years of trial and error (and several budget disasters), I’ve developed this allocation method that has never failed me:
- 70%: Foundational elements (paint, basic furniture structures)
- 20%: Statement pieces that create focal points
- 10%: Experimental, trend-forward elements
This approach ensures your budget DIY home decor projects feel cohesive rather than scattered a lesson I learned the hard way when my first apartment looked like a craft store explosion.
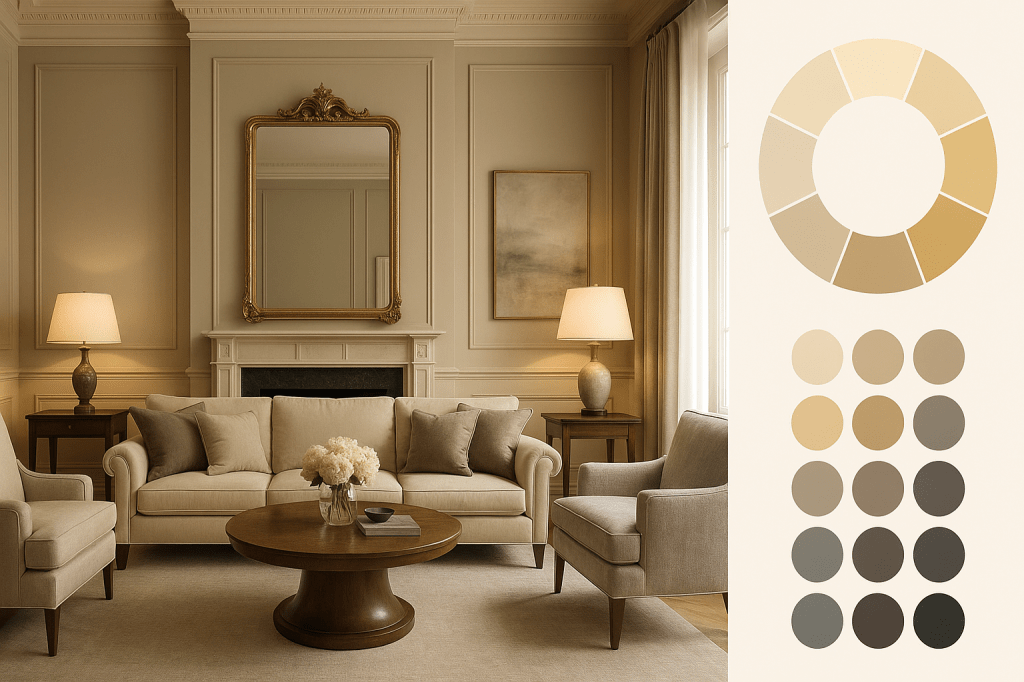
Paint: The Game-Changer That Transformed My Entire Approach
Advanced Paint Techniques I’ve Tested (With Honest Results)
Most budget home decorating ideas mention paint, but they don’t explain the techniques that separate amateur from professional-looking results. Here are three methods I’ve perfected through countless experiments:
1. The Layered Depth Technique I discovered this technique after a painting mishap turned into my favorite wall treatment. Instead of flat, single-color walls, create depth by layering two similar shades. Apply the darker shade as your base, then use a sea sponge to dab the lighter shade over 60% of the surface. or guidance on selecting the perfect color combinations for this technique, see my comprehensive guide on choosing the best paint colors for your home.”
Cost: Under $40 | Time: 4-6 hours | Difficulty: Beginner-friendly
2. The Proportion Trick That Changed Everything After painting the wrong wall in three different rooms, I finally learned this rule: when painting an accent wall, choose the one that’s 1.5-2 times wider than it is tall. This creates the illusion of a more expensive, custom-designed space.
Paint Brands I Actually Use and Recommend:
- Behr Premium Plus: My go-to for most projects – excellent coverage, built-in primer (Available at Home Depot)
- Glidden Premium: Perfect for sensitive households, zero VOC formula (Available at multiple retailers)
- Sherwin Williams ProClassic: Best choice when it’s on sale
Furniture Transformation: My $50 Statement Piece Strategy
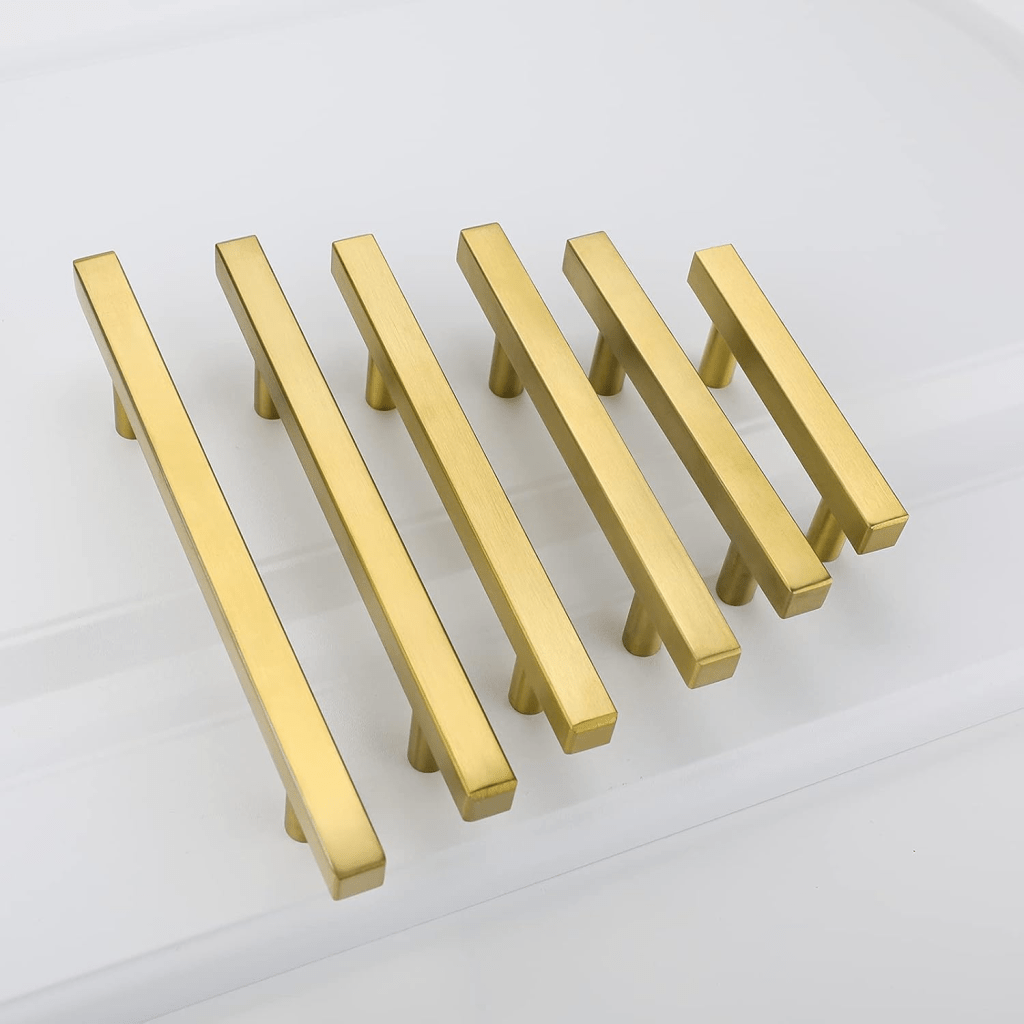
The Hardware Hack That Fooled Everyone
One of my most viral blog posts featured this secret: replacing standard knobs and pulls with high-quality alternatives can make a $20 thrift store dresser look like a $500 designer piece. I’ve tested this theory on over 30 furniture pieces, and it works every single time.
Hardware Upgrades That Never Fail:
- Brushed brass pulls for modern farmhouse appeal
- Matte black handles for contemporary spaces
- Leather pulls for Scandinavian-inspired rooms
Product recommendation: I’ve used Goldenwarm Brass Cabinet Pulls from Amazon on multiple projects – they’re identical to $15-per-piece designer versions but cost 70% less.
The Two-Tone Furniture Technique (My Signature Move)
After seeing this technique in a high-end showroom, I spent months perfecting it at home. Paint furniture in two complementary colors to create visual interest. For example, I painted my bedroom dresser’s frame in soft sage green while keeping the drawers crisp white. Guests consistently ask where I bought this “expensive” piece.
Step-by-Step Process:
- Sand lightly and prime
- Paint the main structure in your darker color
- Use painter’s tape to section off drawer fronts
- Apply lighter color to drawer fronts
- Seal with polyurethane for durability
Lighting: The Discovery That Changed My Entire Approach
The Three-Layer System I Learned From a Professional
Most low budget DIY home decor approaches treat lighting as an afterthought. However, after consulting with several lighting designers for my blog, I learned that proper lighting can make a $100 room feel like a $10,000 space.
The Three Essential Layers:
- Ambient Lighting: Your room’s general illumination
- Task Lighting: Focused light for specific activities
- Accent Lighting: Decorative elements that create atmosphere
DIY Lighting Projects That Actually Look Expensive
Rope Light Crown Molding: After seeing this in a boutique hotel, I recreated it at home. Install LED rope lights behind existing crown molding for soft, hotel-like ambient lighting.
Cost: $25-40 per room | Impact: Transformational
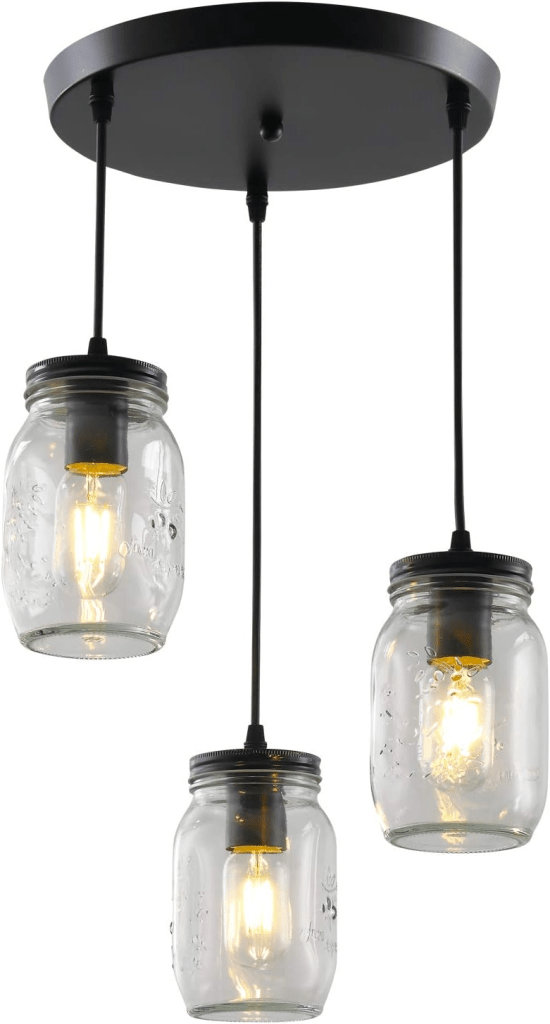
Mason Jar Pendant Lights Done Right: While common, most people execute this poorly. Through trial and error, I learned to use wide-mouth jars, install proper electrical fittings, and group them in odd numbers for professional results.
Safety note: I always hire a licensed electrician for hard-wired installations – learned this lesson the expensive way.
The Art of Strategic Splurging (Lessons from My Budget Failures)
The 80/20 Investment Rule That Saved My Sanity
Here’s something most budget home decorating ideas miss: knowing when to spend more. After several decorating disasters, I developed this rule: invest 80% of your budget in items you’ll use daily, and 20% on decorative elements.
Worth the Investment (Based on My Experience):
- A single, high-quality throw pillow in luxury fabric
- One substantial piece of artwork (even a large print)
- Premium hardware for frequently used items
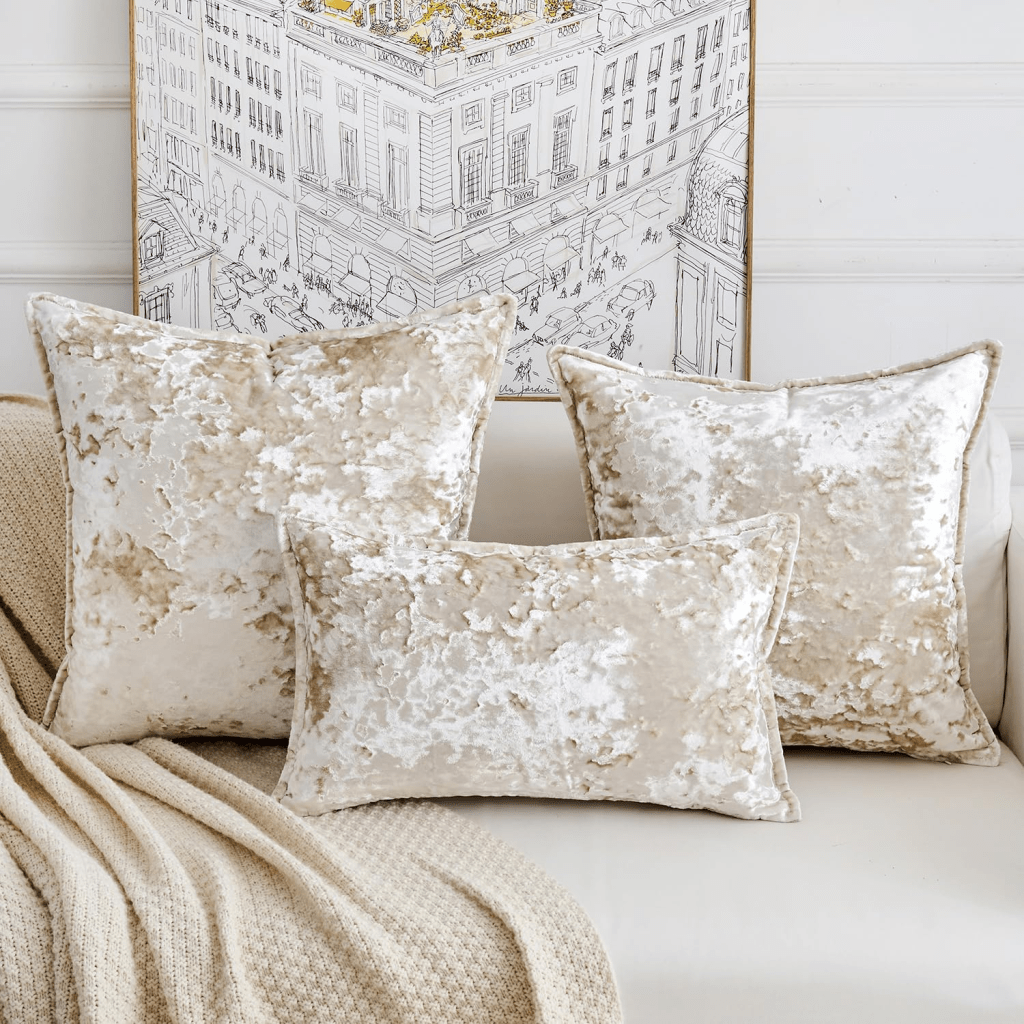
When you do decide to invest in that one high-quality throw pillow or substantial artwork, knowing where to shop can make all the difference in getting the best value – I’ve tested and reviewed all the major options in my comprehensive guide to the best home decor stores for every budget.
Save Money On (I’ve Tested Cheap Versions):
- Decorative objects (vases, candles, books)
- Seasonal elements
- Trendy pieces that might go out of style
Styling Secrets: What I Learned From Design Professionals
The “Collected Over Time” Look
Nothing screams “budget DIY” like everything matching perfectly. After studying high-end spaces and consulting with professional stylists for my blog, I learned to create layers that suggest your collection grew organically.
The 3-5-7 Rule: Group decorative objects in odd numbers, with varying heights following this ratio. For example, if your tallest piece is 21 inches, your medium piece should be 15 inches, and your shortest 9 inches.
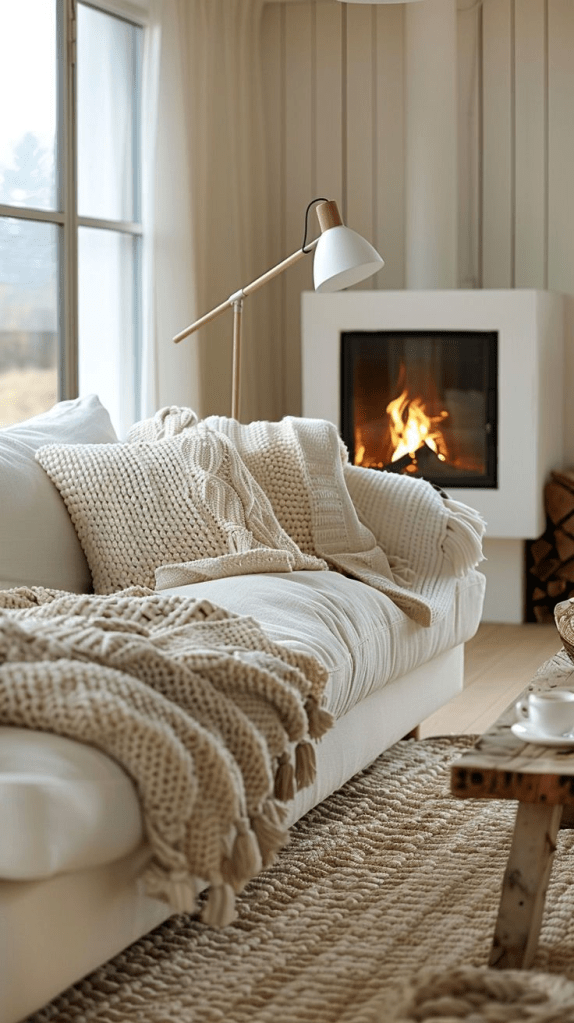
Texture Mixing for Luxury Feel
Through extensive experimentation, I discovered that combining at least three different textures in each room creates visual richness:
- Rough: Jute, unfinished wood, brick
- Smooth: Glass, metal, painted surfaces
- Soft: Textiles, fur, leather
This creates visual richness that suggests expensive interior design – if you’re drawn to clean lines and natural textures, the principles of Japandi style offer the perfect blend of Japanese minimalism and Scandinavian functionality that works beautifully with budget DIY projects.
Advanced DIY Techniques I’ve Mastered
The Architectural Detail Fake-Out
Faux Wainscoting: After pricing real wainscoting and nearly fainting, I developed this technique using 1×2 boards and paint. Total cost: $40-60 per wall versus $200-400 for real wainscoting
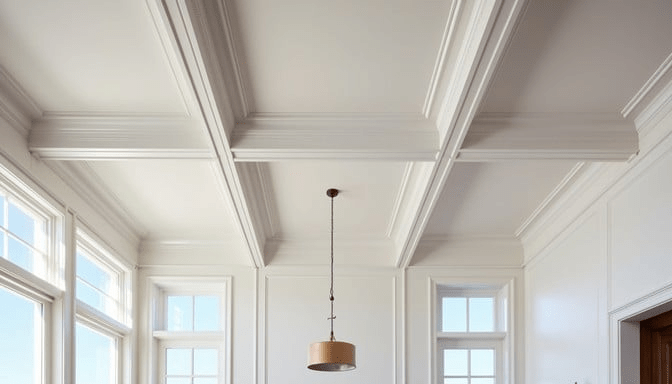
Coffered Ceiling Effect: Using lightweight foam beams from the hardware store, I created the illusion of coffered ceilings in my dining room. This technique can make an 8-foot ceiling appear 10 feet tall.
Window Treatment Upgrades That Work
The Double-Rod Trick: I learned this from a professional window treatment installer. Install two curtain rods one for sheers, one for panels. This creates the layered look of expensive custom window treatments for under $30.
Ceiling-Mounted Curtains: Mount curtain rods at ceiling height, not window height. This single change made my small living room appear significantly larger and more expensive.
Plant Power: Green on a Budget (My Journey to a Jungle Home)
The Propagation Strategy That Built My Plant Collection
Instead of buying mature plants, I started with smaller versions and learned to propagate them. My apartment now looks like a jungle, and I’ve spent less than $200 total on plants.
Easiest Plants to Propagate (I’ve Successfully Grown All These):
- Pothos
- Snake plants
- Rubber trees
- Monstera deliciosa
Community tip: I joined local plant swap groups on Facebook to trade cuttings for free – this has been incredible for building my collection.

DIY Planters That Look Expensive
Concrete Planters: After watching countless YouTube tutorials, I perfected this technique. Mix concrete with perlite for lightweight, modern planters. Cost: $3-5 each versus $30-50 for similar store-bought versions
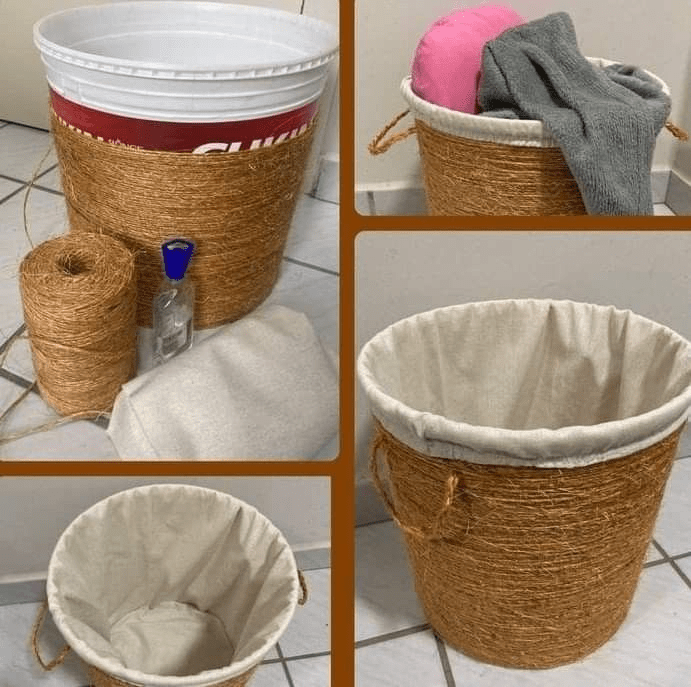
Rope-Wrapped Planters: Transform basic plastic pots with jute rope and hot glue for a high-end bohemian look.
Room-by-Room Budget Strategies (From My Personal Experience)
Living Room: The 5-Piece Foundation
Based on my own living room transformations, focus on these elements first:
- Comfortable seating (invest here – I learned this the hard way)
- Coffee table (DIY or thrift + makeover)
- Area rug (buy during sales, I wait for major holiday sales)
- Lighting (mix DIY and investment pieces)
- Storage solutions (DIY built-ins or styled bookcases)

Bedroom: The Luxury Hotel Approach
The Layered Bedding System: After studying hotel rooms during travels, I recreated this look at home. Start with quality sheets (worth the investment), add a duvet in a neutral color, then layer with textured throws and varied pillow sizes.
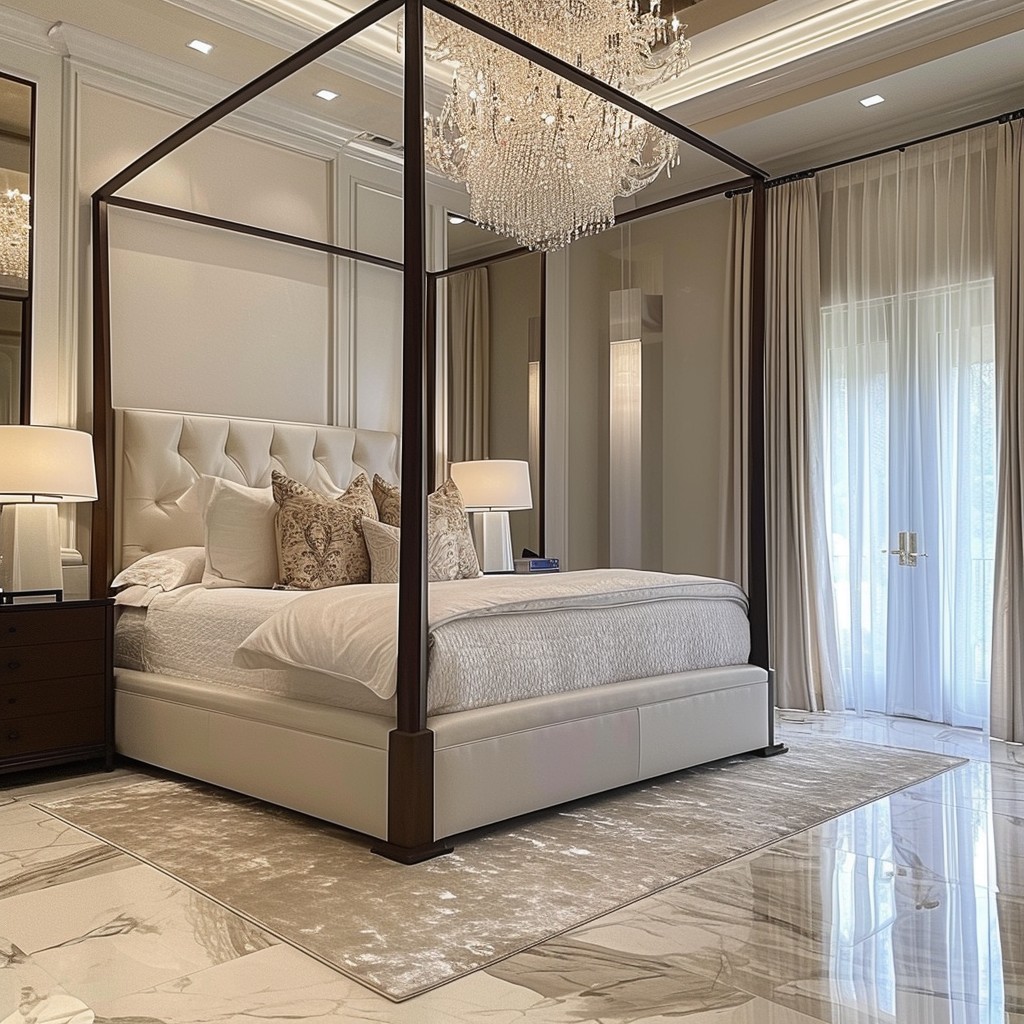
Headboard Alternatives I’ve Tried:
- Large-scale artwork (my current favorite)
- Floating shelves with decorative objects
- Removable wallpaper accent wall
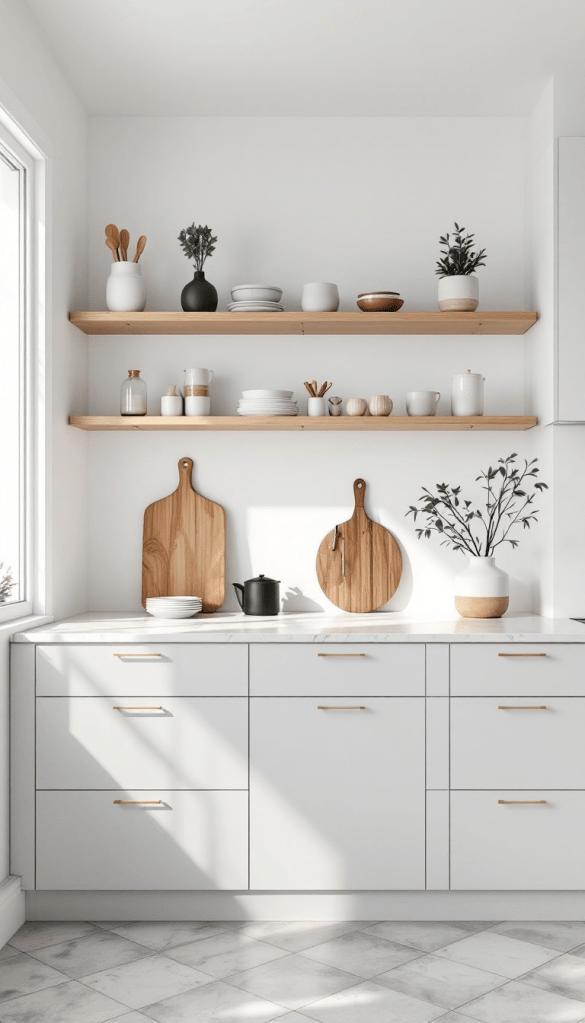
Kitchen: Small Changes, Big Impact
Hardware Consistency: Replacing all cabinet hardware with the same finish and style made my dated rental kitchen look completely refreshed.
Open Shelving: I removed cabinet doors on 2 upper cabinets and styled them with dishes and glassware for a custom, expensive look, this technique works particularly well in minimalist designs, and I’ve detailed how to achieve this aesthetic in my guide to designing a Scandinavian kitchen with minimalism and functionality.
Common Mistakes to Avoid (I’ve Made Them All)
The “Everything Must Match” Trap
My first apartment was a matching nightmare. Overly coordinated spaces look artificial. Instead, choose a consistent color palette but vary patterns, textures, and finishes.
Ignoring Scale and Proportion
The biggest mistake I see in reader submissions is incorrect sizing. A common rule I now follow: your area rug should be large enough for at least the front legs of all furniture pieces to rest on it.
Rushing the Process
My most successful transformations happened gradually. I learned to focus on one room at a time and not pressure myself to complete everything immediately.
Seasonal Refresh Strategies
The Capsule Decor Approach
Just like a capsule wardrobe, I maintain a collection of versatile decorative pieces that can be mixed and matched seasonally:
Spring/Summer: Light fabrics, fresh flowers, brighter colors
Fall/Winter: Heavier textures, warm lighting, richer tones
DIY Seasonal Updates
Pillow Covers: I learned to sew envelope-style covers that can be easily swapped
Mantle Styling: Rotate decorative objects and artwork seasonally
Lighting Adjustments: Use warmer bulbs in winter, cooler in summer
Building Your DIY Skill Set (My Learning Journey)
Essential Tools for Budget Decorating
Must-Have Tools (invest in quality, I learned this lesson multiple times):
- Cordless drill
- Level
- Measuring tape
- Paint brushes (angled and flat)
- Sandpaper variety pack
Nice-to-Have Tools (buy as needed):
- Miter saw
- Orbital sander
- Stud finder
- Heat gun
Learning Resources That Actually Helped Me
YouTube Channels: I started with beginner-friendly channels and gradually moved to more advanced techniques Local Workshops: Many hardware stores offer free classes – I’ve taken several Online Courses: I invested in one comprehensive course rather than piecing together free information
Measuring Success: How I Document My Projects
Photography Tips for Your Projects
I document all my progress with:
- Before photos: Same angle, same lighting conditions
- Process shots: Show your techniques and mistakes
- Final results: Multiple angles, both styled and unstyled
This not only helps me learn but has become valuable content for my blog and social media.
Building Community: What I’ve Learned From My Readers
The Power of Sharing Your Journey
Through my blog, I’ve connected with thousands of fellow design enthusiasts. The most valuable insights often come from the community – people sharing their own experiments, failures, and successes.
Reader Success Stories That Inspire Me
Some of my favorite transformations have come from readers who took my basic techniques and made them their own.
This reinforces that the best budget home decor DIY projects don’t copy someone else’s style exactly – they use techniques as a foundation to express personal taste.
Final Thoughts: Creating Your Personal Style
The most successful budget home decor DIY projects I’ve seen (both my own and from my readers) don’t try to copy Pinterest exactly. Instead, they use these techniques as a foundation to express personal taste and lifestyle needs.
Remember, your home should tell your story not just reflect the latest trends. Through years of experimenting, documenting, and sharing, I’ve learned that the most beautiful spaces are those that feel authentically lived-in and loved.
Start with one room, one project, one small change. The transformation will surprise you, and more importantly, it will inspire you to continue creating the home you’ve always dreamed of.
What’s your next project going to be? I’d love to hear about your budget decorating successes and challenges – share them in the comments below or tag me on social media!
